Access point wall mounting information
Using the supplied mounting kit, the Stellar 6 (NAP-650) access point can be installed on a wall or a pole outdoors or indoors.
Up-to-date information on mounting the access point can be found in the Quick Start Guide. The manual is available in PDF format on our website in the Download Center section.
Wall-mounting template showing the distance between the mounting holes for your Netcraze model:
Tip
Mounting to a wall
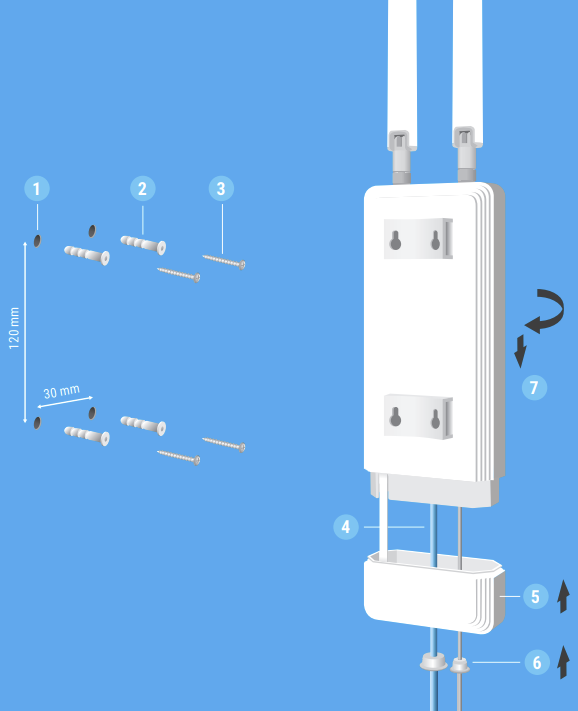
Mark the four fixing points on the wall:
30 mmapart horizontally and120 mmapart vertically. Drill a5 mmdiameter hole at each marked position.Insert the ribbed plastic wall plugs into the holes. For drywall surfaces, screw in the drywall anchors with a screwdriver until they are flush with the surface.
Drive the self-tapping screws into the wall plugs/anchors, leaving approximately
5 mmof the screw protruding from the surface.Route the Ethernet and grounding cables through the dedicated openings in the bottom cover, then connect them to the access point.
Slide the bottom cover upwards onto the main body until it is fully seated and secure.
Use the supplied rubber plugs to seal the openings around the Ethernet and grounding cables.
Hang the access point on the screws.
Mounting to a pole
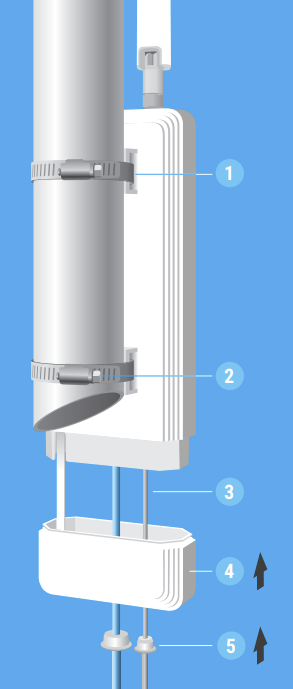
Thread the metal straps through the mounting slots on the back of the Keenetic access point.
Position the access point against the pole. Wrap the straps around the pole and lock and tighten them with a screwdriver.
Route the Ethernet and grounding cables through the dedicated openings in the bottom cover and connect them to the access point.
Slide the bottom cover upwards onto the main body until it is fully seated and secure.
Use the supplied rubber plugs to seal the openings around the Ethernet and grounding cables.